

This article covers configuring write-off document types, so that 'Write off' appears as an option and opens correctly. It applies to sale invoices, sale orders and purchase invoices – the setup steps are the same in each case, only the document type names differ. This is an administrator task, separate from the day-to-day steps in 'How to write off a sale invoice', 'How to write off a sale order' or 'How to write off a purchase invoice'.
Why 'Write off' might not appear at all
If 'Write off' does not show as an option on a sale invoice, sale order or purchase invoice – whether you'd expect it in the three dots menu or as a standalone button – the source document type has no matching conversion set up to the corresponding write-off document type.
To set this up:
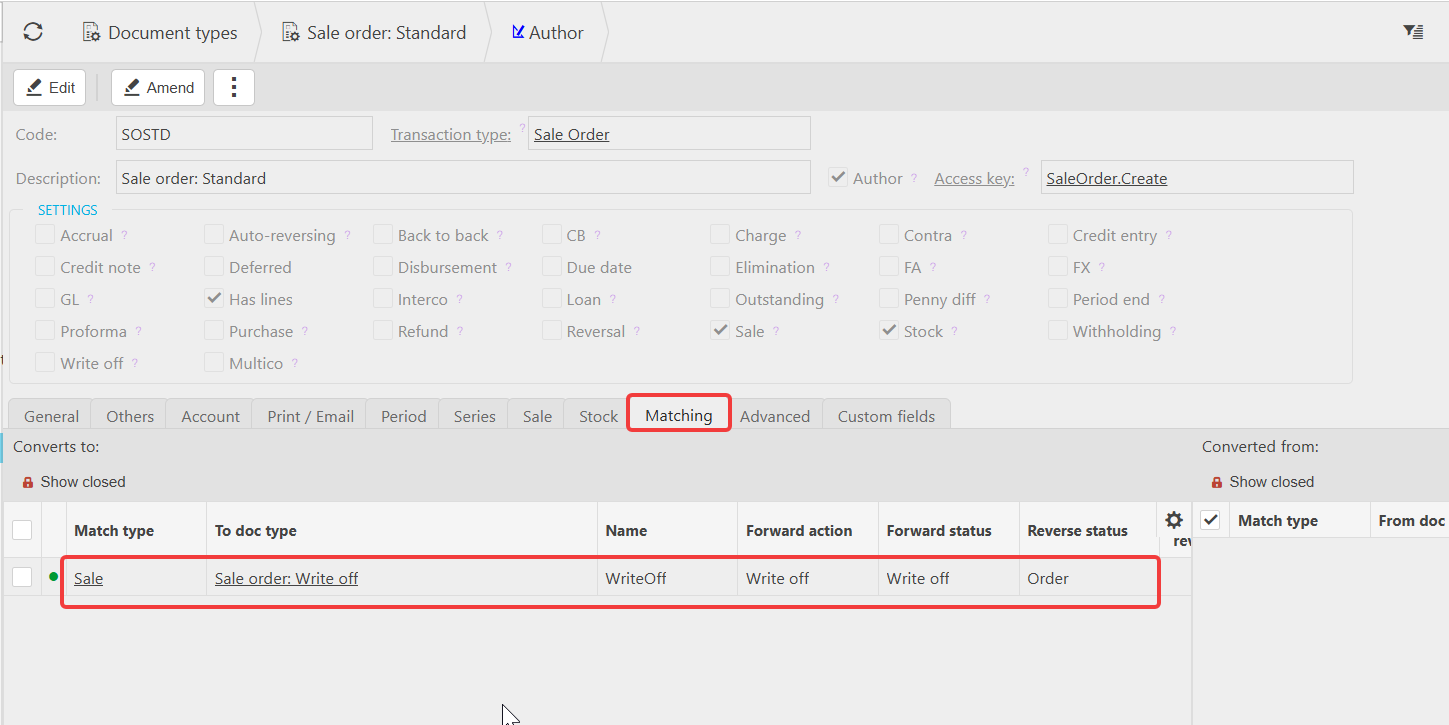
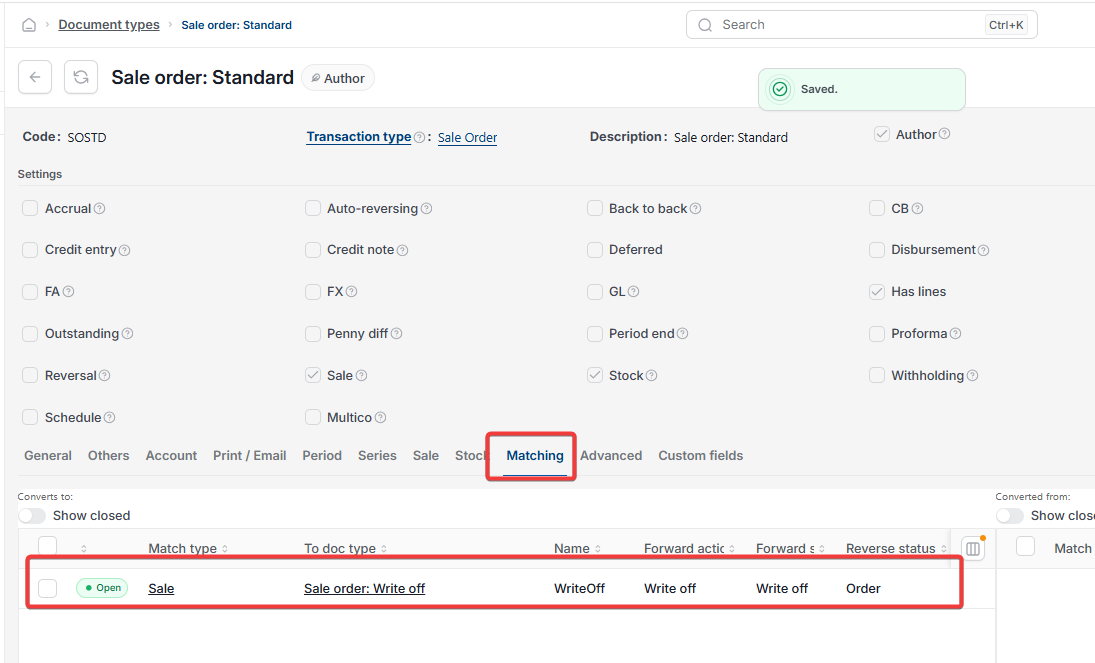
- Navigate to the source document type, for example 'Document types' > 'Sale order: Standard'
- Select the 'Matching' tab
- Under 'Converts to', select 'Add'
- Set 'Match type' to match the source (for example 'Sale'), 'To doc type' to the corresponding write-off type (for example 'Sale order: Write off'), and 'Name' to 'WriteOff'
- Set 'Forward action', 'Forward status' and 'Reverse status' each to 'Write off'
- Save the document type.
The same steps apply whether you're setting this up for a sale invoice, sale order or purchase invoice – only the source and 'To doc type' values change. Once the conversion is saved, 'Write off' becomes available on documents of that source type.
Why the write-off pop-up appears blank
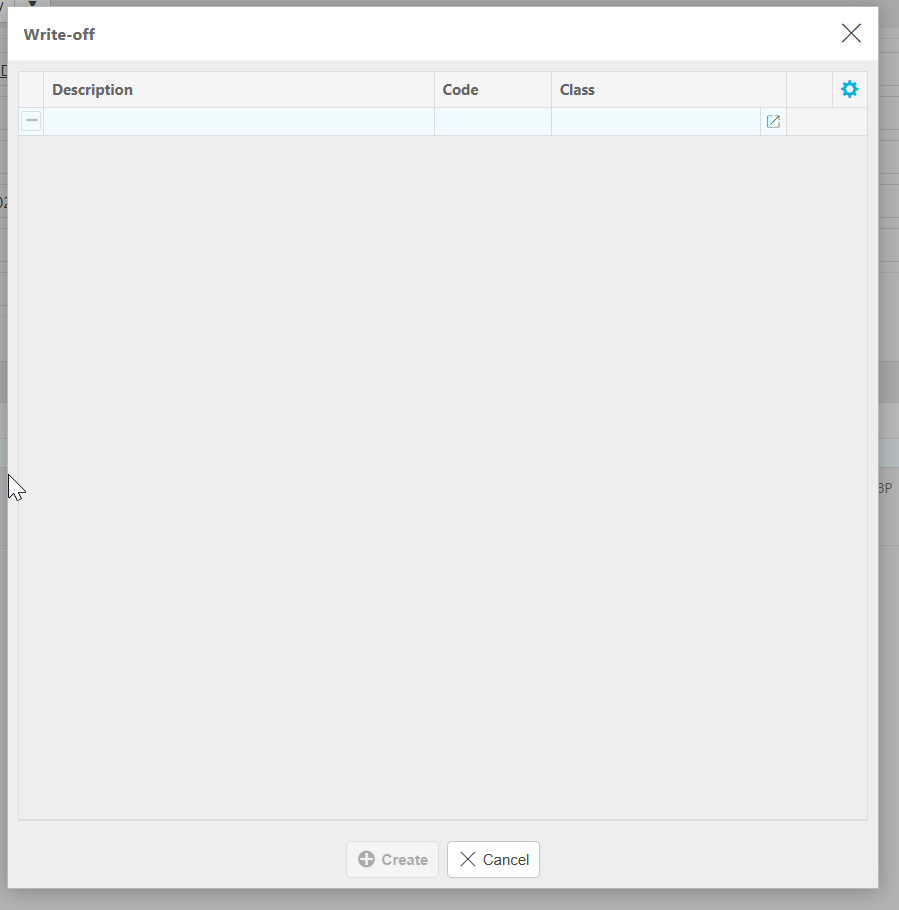
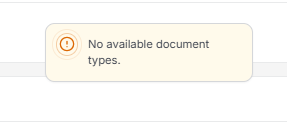
If 'Write off' appears and opens, but the resulting window is empty or you encounter an error that states 'no available document types' – the write-off document type itself (for example 'Sale: Write off', 'Sale order: Write off' or 'Purchase: Write off') has not been unlocked or assigned a document series.
To assign a document series:
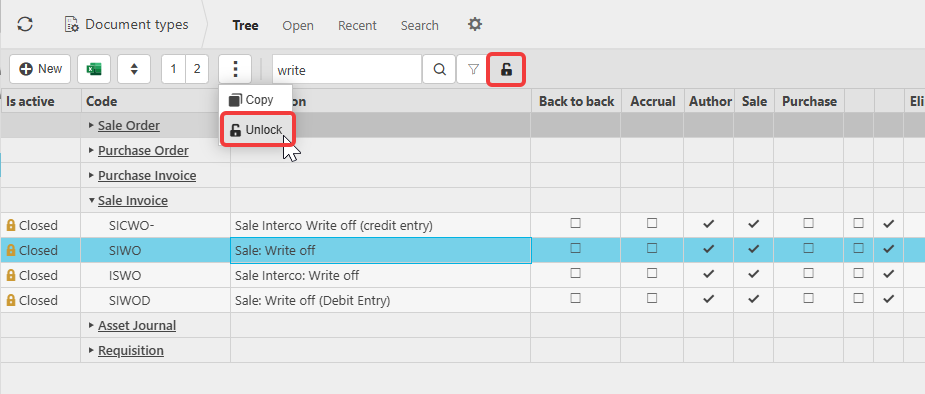
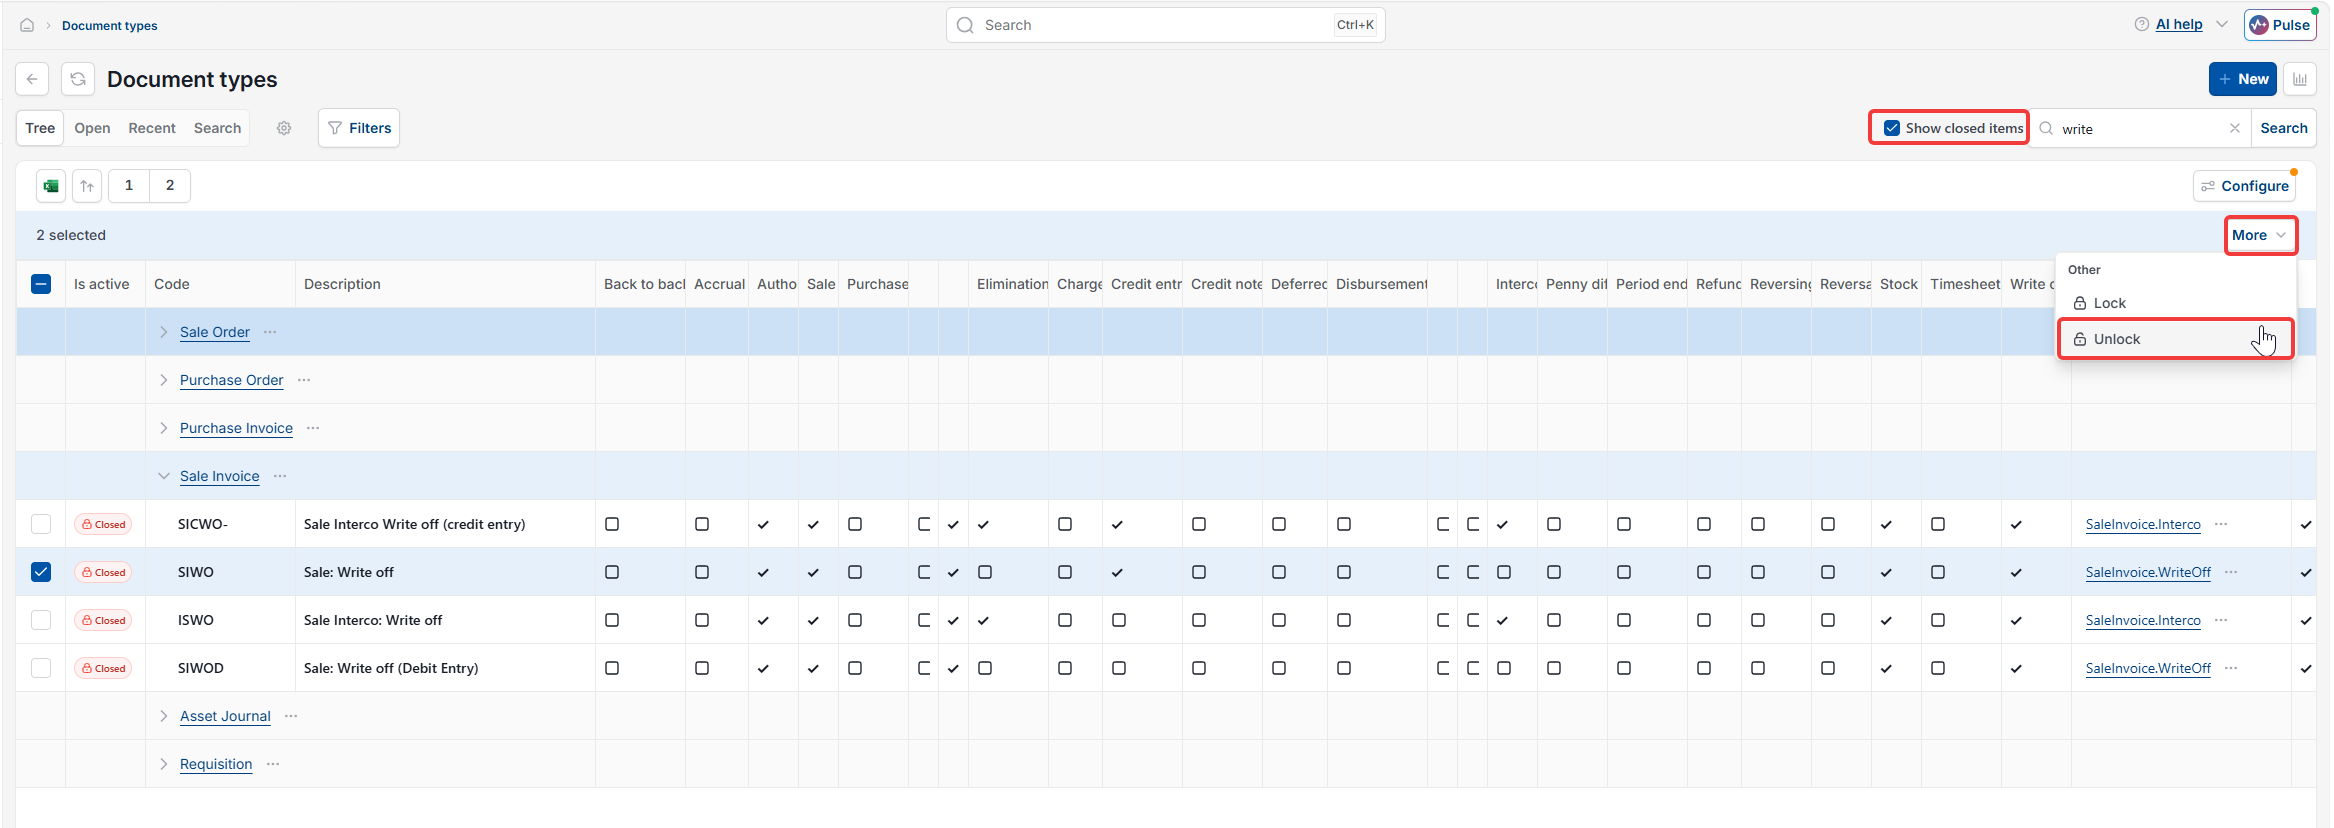
- Navigate to the write-off document type, for example 'Document types' > 'Sale: Write off'. You may need to expose locked documents first – select the green dot, which changes to a padlock icon, or tick 'Show closed items'
- Select the three dots (⋮) menu or more button
- Select 'Unlock'
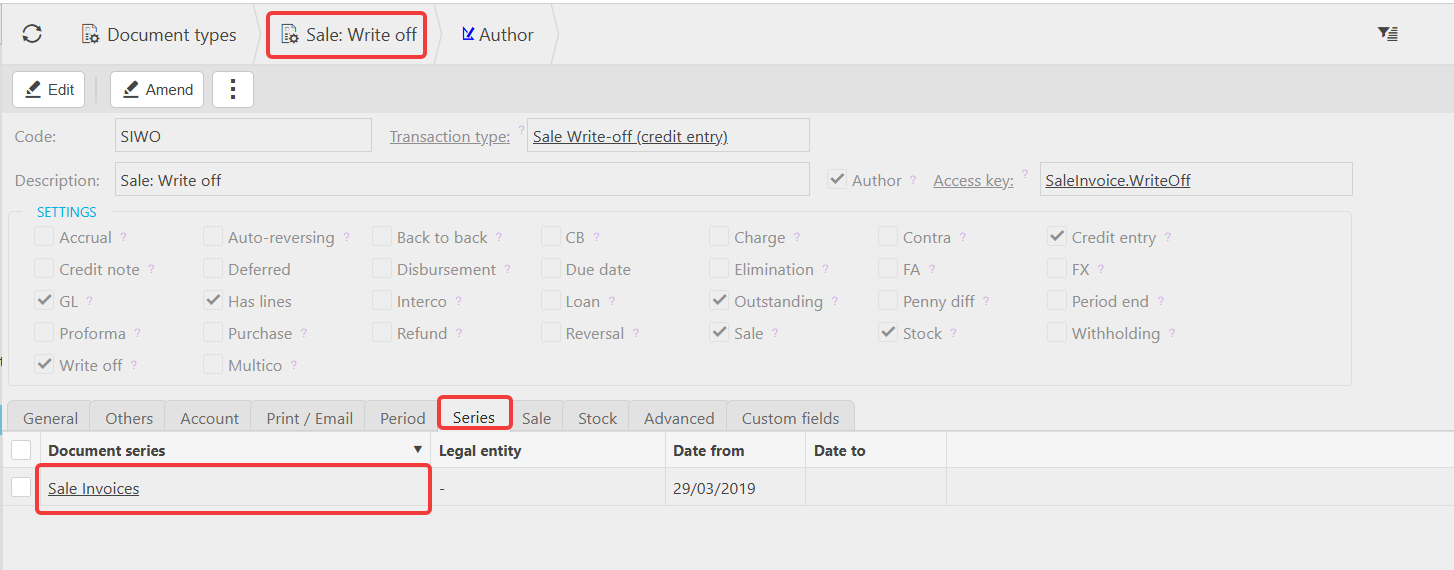
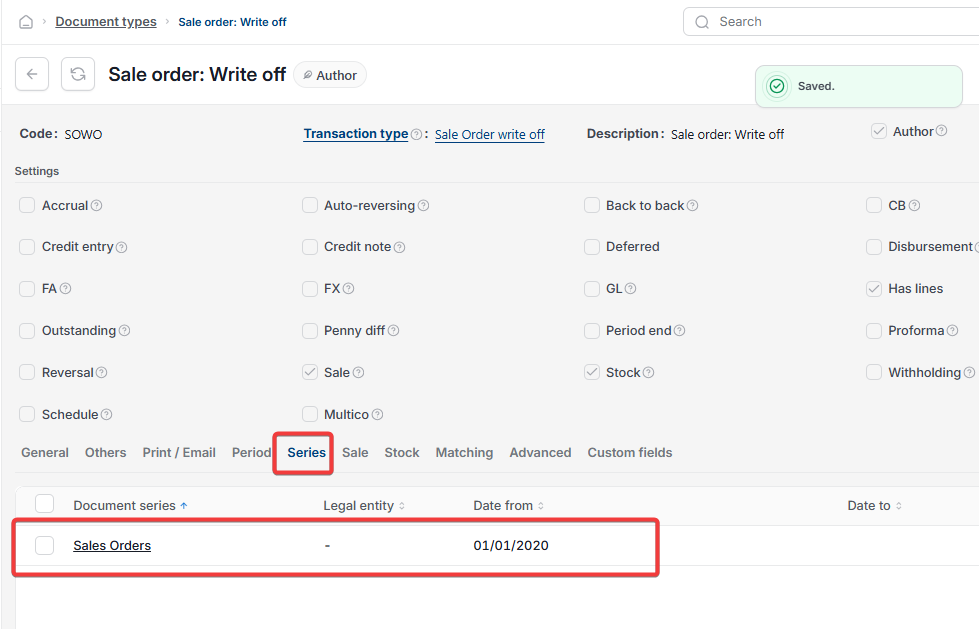
- Go into the document and select the 'Series' tab
- Add a row under 'Document series'
- Select the appropriate series, for example 'Sale Invoices' for 'Sale: Write off', 'Sales Orders' for 'Sale order: Write off', or the equivalent purchase series for 'Purchase: Write off'
- Confirm 'Date from' is populated
- Save the document type.
Once both the matching conversion and the document series are in place for a given document type, selecting 'Write off' will open a pre-filled write-off document instead of doing nothing or showing a blank pop-up.
Write off document type setup
Unlock document type
Write off setup
Write off not showing
Write off missing from menu
Document series
Matching conversions
Write off blank pop up
Sale write off setup
Purchase write off setup